Windows 10 – How to Set A Data Limit For A WiFi Connection
The Brand New Windows 10 will Allow you to Set Data Limit for A WiFi Connection, You Can Construct Data Limits In the Data Usage Page in Settings (Windows 10).
You may Know that Setting a data limit for an internet connection will grant Windows to help you how to much you can stay. If you are Going to Set your Data Limit for WiFi Connection, Let’s Begin.
How to Set A Data Limit For A WiFi Connection (Windows 10)
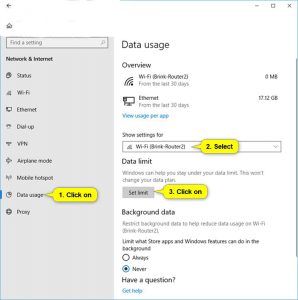
Step Number 1, You will Need to Open “Settings” Page After that, I will Recommend you to Click on the “Network & Internet” Button.
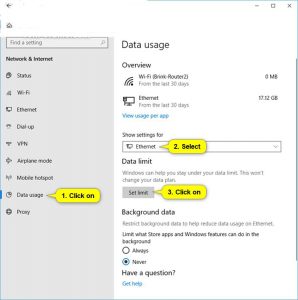
Step Number 2, If you are in “Network & Internet” Window. On the Left Side of Screen you May see “Data Usage” Option Just Click on Data Usage to Visit the Data Usage Page.
Read Also: Google Chrome – How to Disable A Keyboard Shortcut
You will Need to Choose the Network Connection you want to set a Data Limit From the “Show Settings For” I will Recommend you to drop the Menu on the Right side of Screen And Hit on the “Set Limit” Icon. (You can See the Screenshots Below)


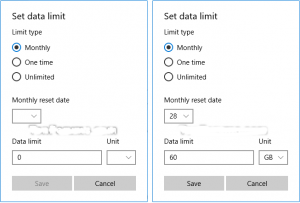
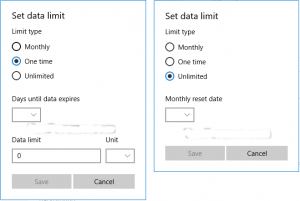
Step Number 3, You will Need to Set A Data Limit For WiFi How to Much you want for this Network Connection After that, I will Recommend you to Hit The “Save” Button. (You can See the Screenshots Below)


Step Number 4, Now You are Completely Done.
If You Have Any Kind Of Question-Related To This Article You May Ask In The Comment Section Below.


